This educational and recreational assembly can be found in different versions on our website. The presented version uses the power of a transformer and, if properly assembled, can launch a projectile a few meters away.
Here is a very interesting project for schoolwork, demonstrations, and science fairs. It is an electromagnetic cannon based on a solenoid of homemade construction, simple to assemble.
The cannon can fire small projectiles such as beans or peas, plastic balls or other materials at a distance that will depend only on the quality of the assembly of each one.
The circuit has a solenoid which, when energized, violently pulls a metal core into it, thus throwing the small projectile, as shown in Figure 1.
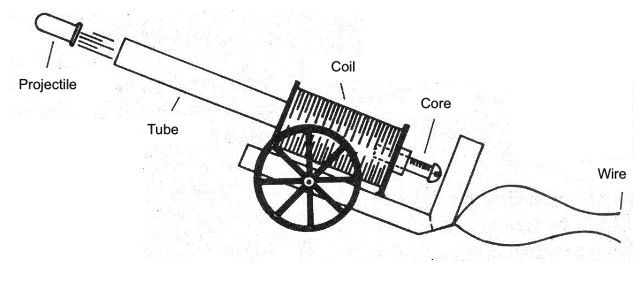
The working principle is extensively explored in other projects and better explained in our books.
When a current flow through a conductor, a magnetic field appears around that conductor. By winding the conductor so that it forms a coil, as shown in Figure 2, the magnetic field created is reinforced, being able to attract metallic objects to its interior.
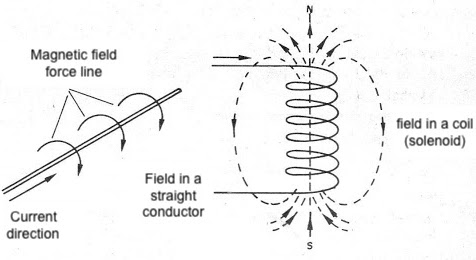
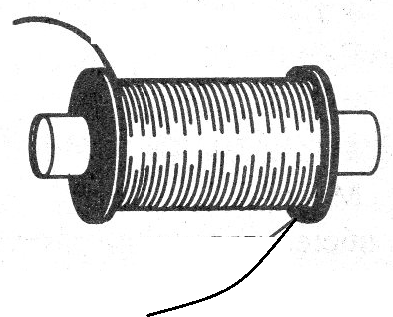
If we wrap the wire in a coil, we have a solenoid which is a very useful component in many applications that involve the production of mechanical forces. In Figure 3, we have the way to obtain this solenoid.
Connecting the solenoid to a voltage source and placing a metallic screw in its core, for example, so that most of its length stays out, as shown in Figure 4, we have a very interesting effect when closing the circuit.
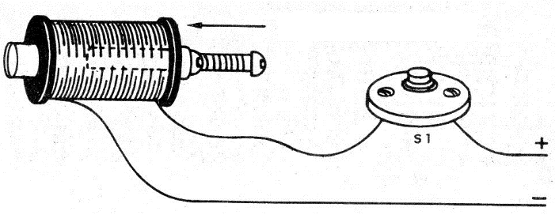
The circulating current, when pressing the switch, creates a strong magnetic field inside the solenoid which pulls the screw in with force. With that, if there is a small object inside the solenoid, it will be launched forward.
This is precisely the principle of operation of our small cannon.
Assembly
In Figure 5, we have the different parts that make our small cannon.
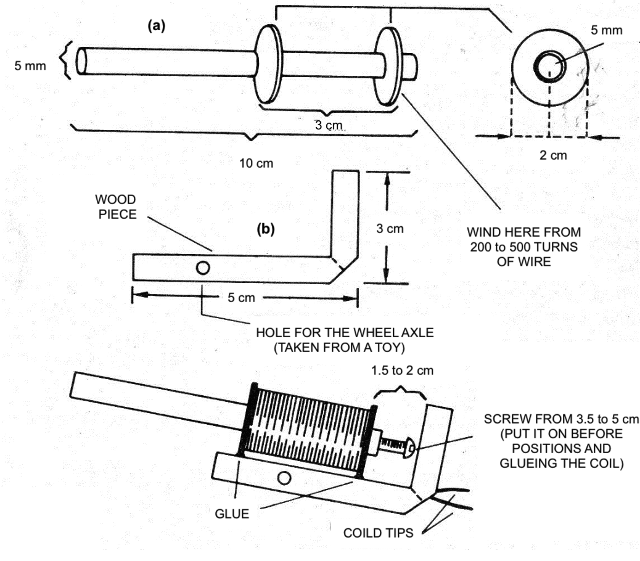
The enameled wire can be used from old transformers.
Then, we wrap the small coil of 200 to 500 turns of fine enameled wire (28 to 32) to fill it completely. The core will be a 3.5 to 5 cm metal screw with a thickness which allows it to slide without friction on the solenoid core. To weld the solenoid wires, it is necessary to scrape their ends.
In Figure 6, we give a power supply for the circuit.
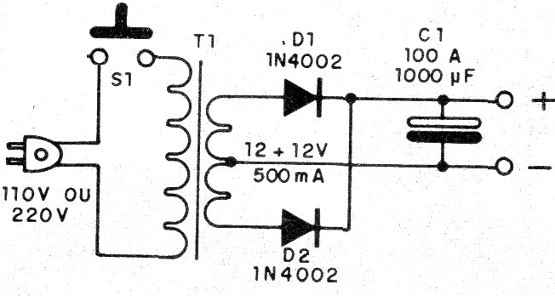
The transformer has a primary winding according to the local network and secondary of 12 + 12 V with a current between 500 mA and 800 mA. The electrolytic capacitor must have a working voltage of 25 V or more.
The solenoid tube must be made of cardboard or plastic. Do not use a metal tube.
To test the device, position as shown in Figure 1, and place a small projectile in the solenoid tube. By pressing the pressure switch, the core (screw) must be pulled violently into the solenoid and the projectile thrown out.
Test with the best separation of the core at rest to obtain more release force. Do not press and hold the switch for too long, as the strong current can heat up and damage the solenoid.
X1 - Solenoid - cannon - see text
S1 - NO pressure switch
T1 - 12 + 12 V transformer - see text
D1, D2 - 1N4002 or 1N4004 - silicon diodes
C1 - 1 000 uF - electrolytic capacitor
Miscellaneous:
Power cable, fine enamelled wires, wires, solder, material to build a cannon, etc.


