
This device can be used in the laboratory for various experiments, in greenhouses for control of plant irrigation, in the home and in many other interesting applications. What it does, indicate whether or not a plant needs watering.
If the reader likes plants, experiments in botany or simply want to have an electronic control of the humidity of the pots or even a garden, why not use an electronic circuit for this?
What we have described is nothing complex since only four components are used with a very good result.
By leaving sensors (pieces of wires) in the vessels that we want to control, simply make the simple connection of the meter and have accurate reading of the soil moisture.
We suggest the following applications for the circuit:
* Control of experiments in botany laboratory
* Control of soil moisture in pots, greenhouses, earthworm crops or even in the garden.
* Demonstrations in science fairs or practical classes.
Operation Principle
Pure water is insulating and the dry soil too. However if the earth is wet things change: the mineral salts that exist in the earth dissolve and make it conductive. The more moisture the more salts dissolve and the earth becomes more conductive.
The electric companies themselves take advantage of this fact by burying metal bars that make contact with the wet earth, thus serving as a transmission line for electric energy.
We can establish, therefore, a relation between the capacity of the earth to conduct the current and its humidity with good precision.
Of course, depending on the soil types considered, small variations in behavior may occur, but in general, a current reading for moisture assessment does not imply a compromise of accuracy.
What we do then is to "jab" in the ground examined two electrodes that are nothing more than two pieces of hard wire without cover as shown in figure 1.
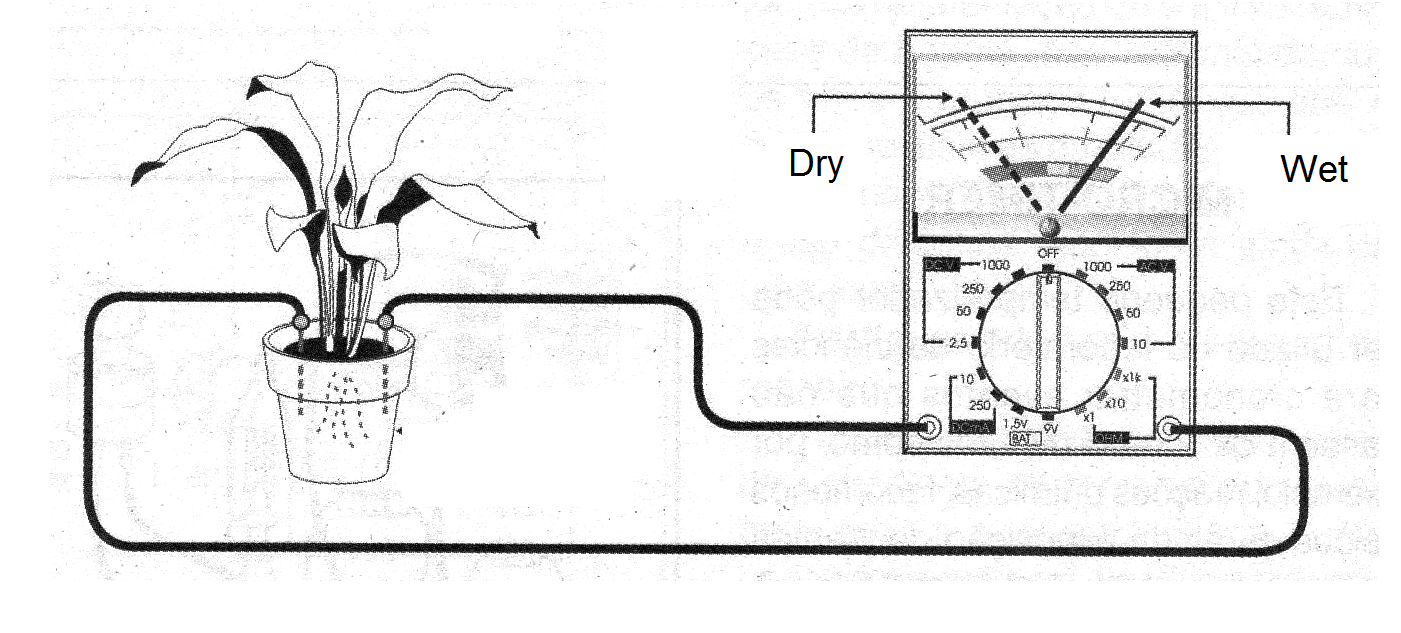
Circulating a current between them will be indicated by M1. Being fixed the distance between them and also the size, the current practically will depend on a single factor: the humidity.
Other types of electrodes can be made for special moisture measurements.
ASSEMBLY
In figure 2 we have the diagram and the assembly of this apparatus.
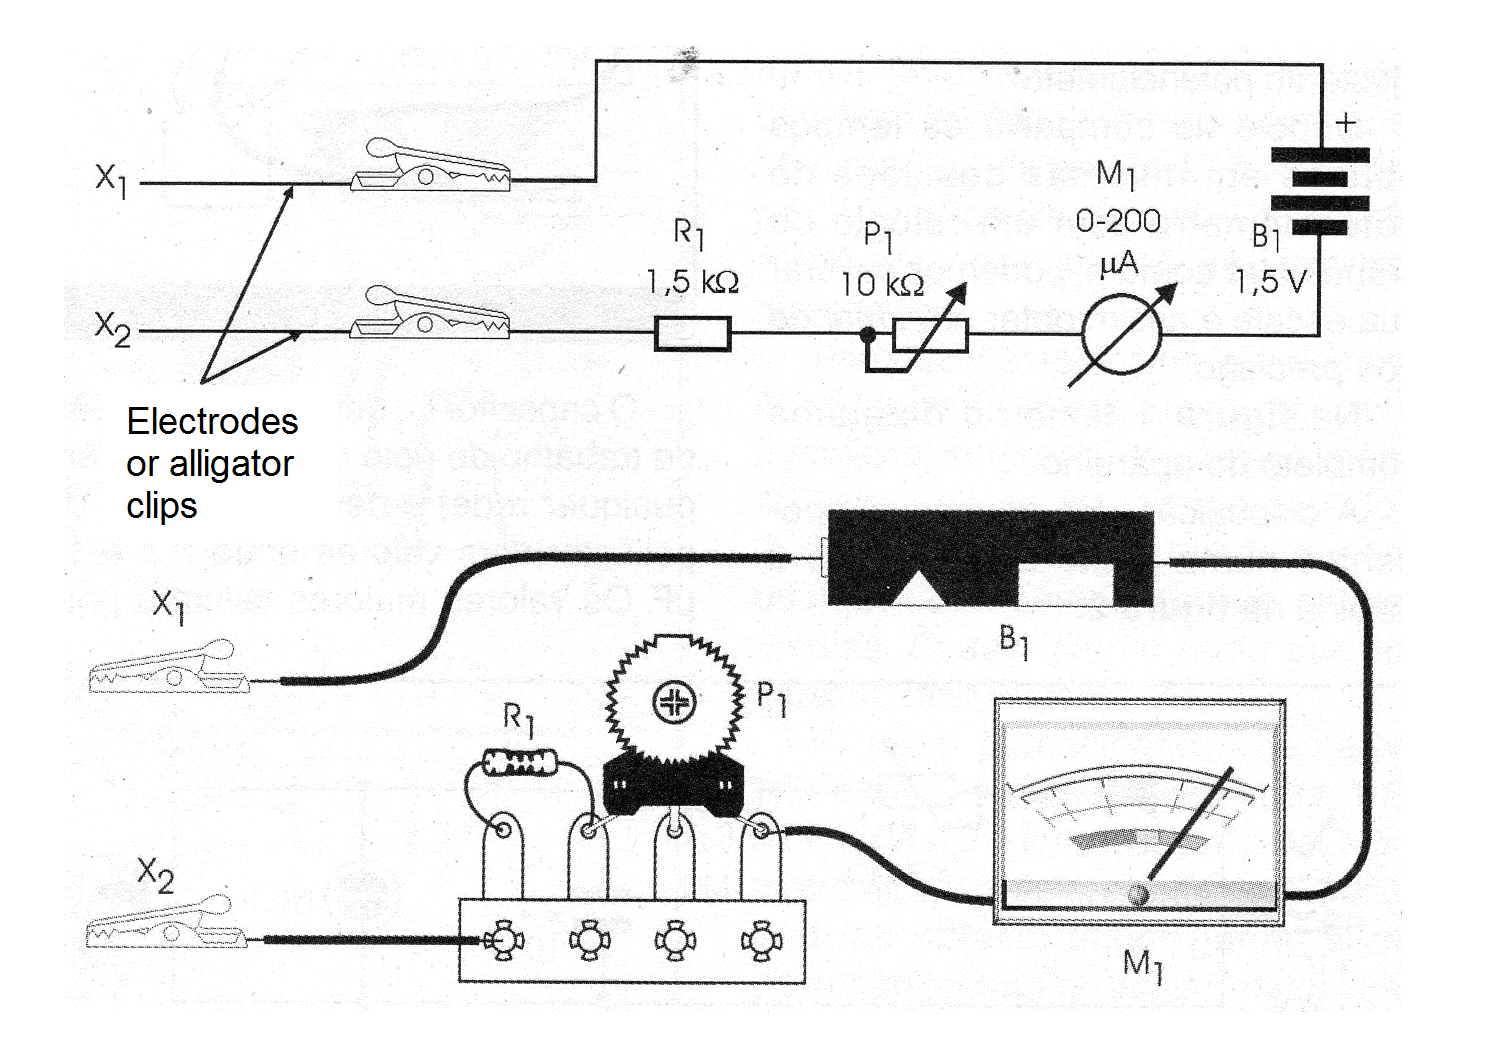
The only component that may be harder to obtain is M1. It is a microammeter of 0-200 uA or close to that. Before mounting the appliance, obtain the meter. If you can, the rest is very easy.
In assembly, the only caution to be observed is the cell and M1 polarity.
If, after finishing the assembly and testing the instrument, you notice that the instrument needle tends to the left and not to the right, just reverse the connection.
For the connection of the electrodes we leave two wires with clips that will be attached to the pair of electrodes. The electrodes are constructed as shown in figure 3.
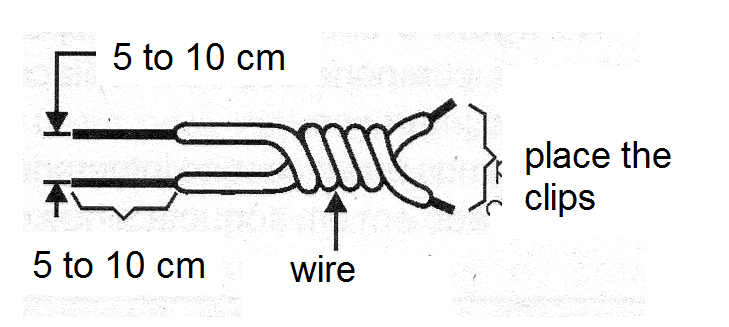
It will be convenient to have a good amount of electrodes to place in pots and flowerbeds. We recommend that they be fixed, just to have a good contact with the earth.
The scale of the instrument should be established experimentally, starting from a vessel with totally dry earth and then throwing water until the land is completely soaked.
The trimpot adjustment is made so that with the totally wet earth we have the maximum current in M1.
PARTS LIST
M1 – Microameter 0-200 uA or equivalent
P1 - 10 k ohms - trimpot
R1 - 1,5 k ohms - resistor - brown, green, red
B1 - 1,5 V - 1 small battery
Miscellaneous: Box for mounting, alligator clips, wire, solder, bridge terminals, rigid wire for electrodes, etc.
Note: no main switch was used, leaving the claws separate, there is no power consumption.


