
If the reader has a sensitive microammeter or milliammeter, you can use it in an ohmmeter, ie a resistance meter
The ohmmeter that we describe can measure resistances and with a microammeter of 100 uA of full scale we can reach resistance values up to 100 k ohm. With a 0-1 mA instrument, we can measure up to 10 k ohms.
The circuit is extremely simple and can be powered by one or two small batteries.
There is no need for amplifier elements, so we will only have one adjustment, the zero or zero adjustment done by a common potentiometer or trimpot.
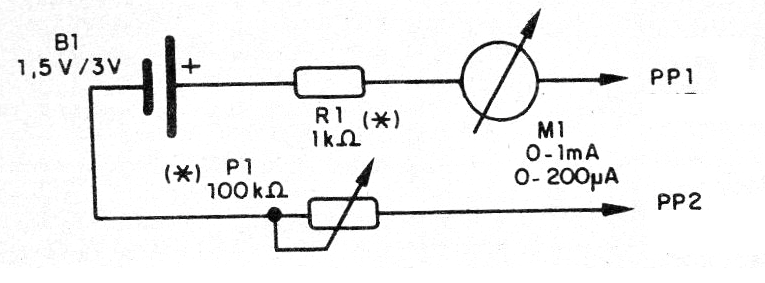
In figure 1 we have the complete ohmmeter diagram.
In figure 2 we have the arrangement of the components on a terminal bridge. The resistor R1 will be 1k for instruments from 100 uA to 500 uA full scale and 470 ohm for 1 mA instruments.
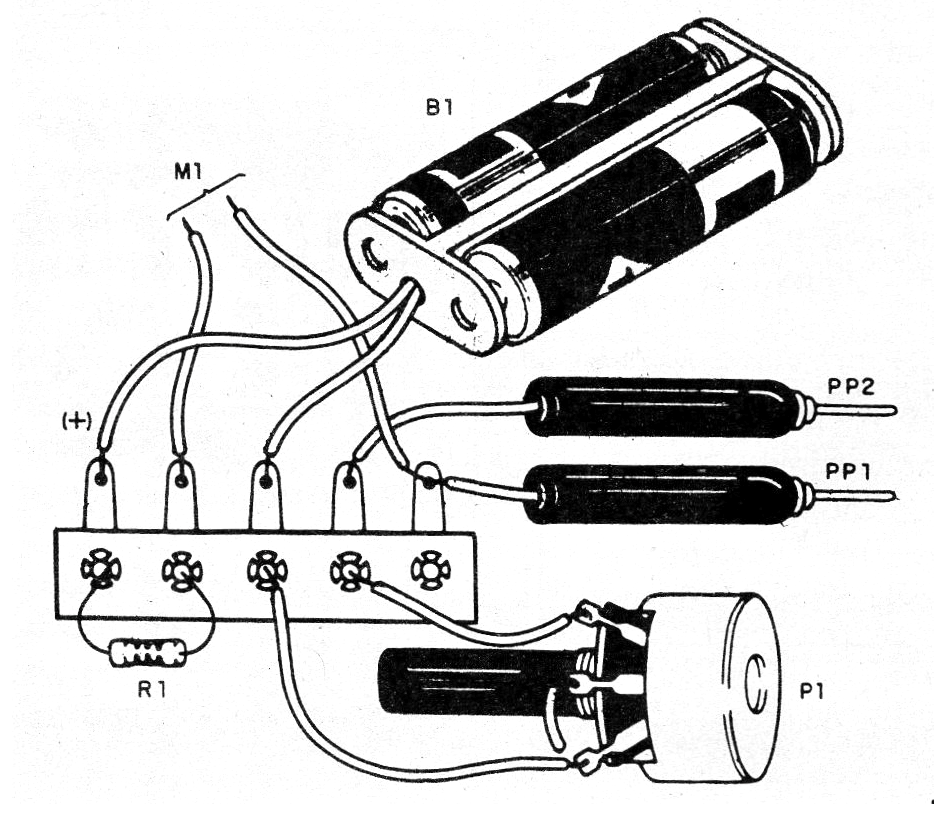
The potentiometer or trimpot will be 100 k ohm for instruments from 100 to 500 uA and 47k for 1 mA instruments.
The probes, red and black, can be acquired or improvised with large studded nails. The scale will be ugly taking as resistors of known values. To use the instrument, firstly test probes and adjust P1 to obtain full deflection or zero indication of the resistance scale.
Then simply push the test leads into the terminals of the resistor or component of which you want to know the resistance. All tested components must be disconnected from their circuits.
Material list
B1 - 1,5 or 3 V - 1 or 2 batteries
M1 - Microammeter or milliammeter 100 uA at 1 mA
P1- 100k ohm - trimpot or potentiometer - see text
R1- 1 k ohm x 1/8 w resistor - brown, black red - see text
PP1, PP2 - Red and black probes
Miscellaneous:
Battery holder, terminal bridge, mounting box, wires, solder, etc.


