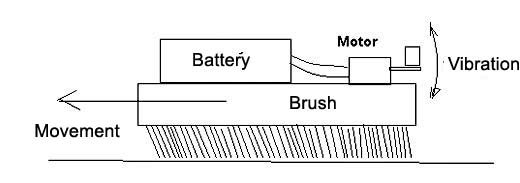
The idea is simple. We put on a common brush an engine and we power it with batteries. At the motor shaft we attach a small object, such as a washer or nut so that the rotation occurs eccentrically, creating strong vibration.
Bending the bristles of the brush backwards, by heating, the vibration makes the robot rapidly advance with the transfer of the vibrations. Figure 1 shows what happens.
See on the link the film showing the movements of our prototype.
We used the assembly of this robot with the fifth grade students of Colégio Mater Amabilis in Guarulhos – Brazil with great success.
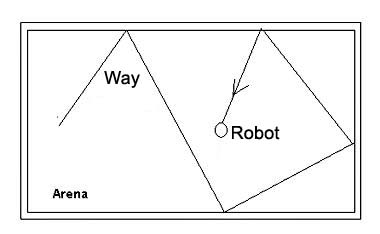
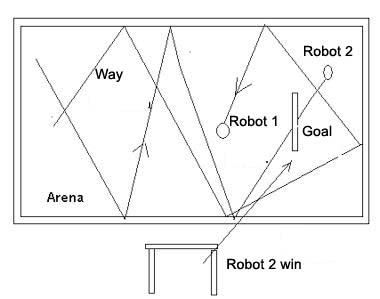
As we can see on the film, using an oval brush, the robot bounces back when it encounters an obstacle. So when it is loose in a room, it will be walking at random. In an arena it will be banging back and forth intermittently until its batteries run out, or it is turned off, as shown in Figure 2.
Several competitions can be programmed based on the behavior back-and-forth of the small brush robot.
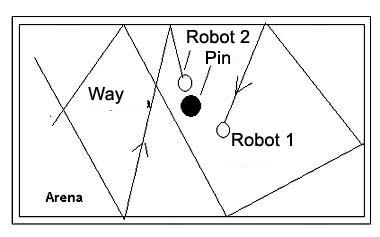
1. Put a pin in the center of the arena and then two or more robots of students which will be released simultaneously. The one that takes down the pin first is the winner of the match. Figure 3 shows this match.
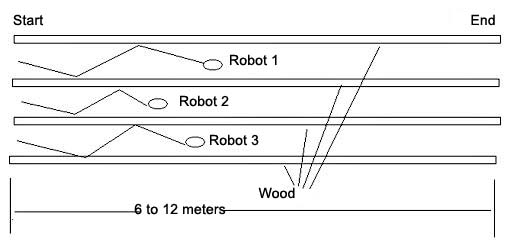
b) Make lanes (two or more) with small and thin tablets so that the robots can run within them. In this case, can be performed a robot race. Figure 3 shows how this can be done.
c) Finally, we suggest a competition in which we use a goal in an arena. Robots are loose and the first to get through it will be the winner, as shown in Figure 5.
Assembly
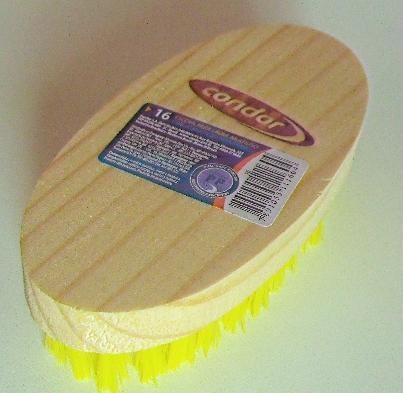
The assembly of the brush Robot is extremely simple. We use a common brush, which can be found in most supermarkets. For a school competition will be interesting that everybody uses the same brush, so that there is uniformity on the robot performance.
The circuit consists simply of a little engine battery connected to a two battery holder, as shown in Figure 6.
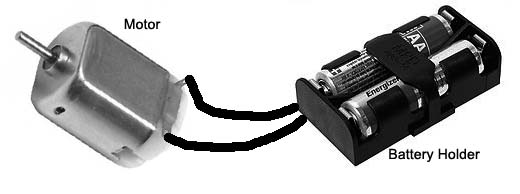
In the case of the fifth graders, the small engines are already supplied welded to the battery holder wires for the students.
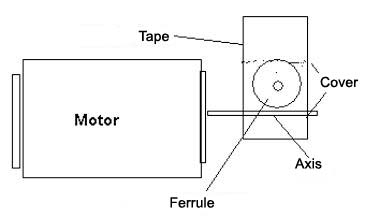
The assembly begins with the placing of a small nut or washer attached to the shaft eccentrically, as shown in Figure 7.
The brush we used is the type shown in Figure 8.
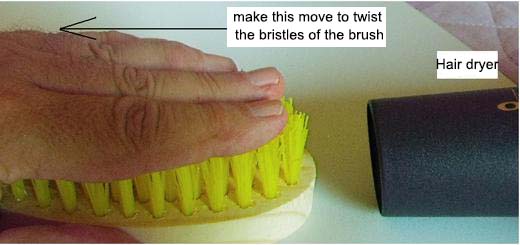
In the next stage of the assembly, we bend the bristles in one direction using hot air. Running a hand through the bristles and focusing the hot air from a hair dryer, we slightly bend the bristles, as shown in Figure 9.
After we put the motor and the battery holder on the upper part of the brush using strong glue (hot glue, super-bond, plastic glue, etc.). Figure 10 shows how this is done.
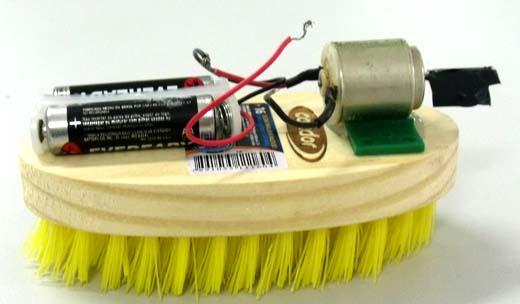
Insert the batteries into the holder and check if the motor rotates and if there is a good vibration.
Testing and Using
Just put the batteries in the holder and drop the robot on a flat ground or a table. It must move quickly as shown on our film.
Proven the operation you can use your robot, program demonstrations and surprise your friends.
1 standard brush
1 engine 3 or 6 V (*)
1 holder for two small batteries and 2 small batteries
1 washer or small door
Glue
1 piece of insulating tape


